


Pre-requisites
Understanding of Version Control.
Knowledge of basic Git commands i.e. git init, git add, git commit, git status, etc.
Knowledge of more complex Git commands i.e. git log, git branch, git merge, git checkout, etc.
If you are already comfortable with all of these, then let us head right in and learn how to warp history in Git. 🤓
Introduction
If you are here, I would assume that you already have some preliminary knowledge of Git and how it works. At this stage, a lot of people think that Git is mostly around committing changes, pushing and pulling to remote repositories and there exists a fear of losing some changes or causing a gitsaster. This suggests there is a core feature of Git that many people haven't toyed with or few have any idea that it exists. This feature is the ability to "rewrite history" with Git. Yes. It is exactly what you are thinking, it is the same ability Dr Strange has when he uses the Eye of Agamotto.

Except, this is just limited to little realities we create in our several gitverses. With certain commands, we can "alter" existing commits. So why would we want to do this? We do this because rewriting our git history would help clean up, debug and reorganize our projects thereby making our commit history more readable.
In this article, I'll be taking you through some commands that are commonly used to rewrite git history. There are a whole bunch of them, but in this article, we would be focusing on just git rebase, git revert and git cherry-pick.
Git Rebase
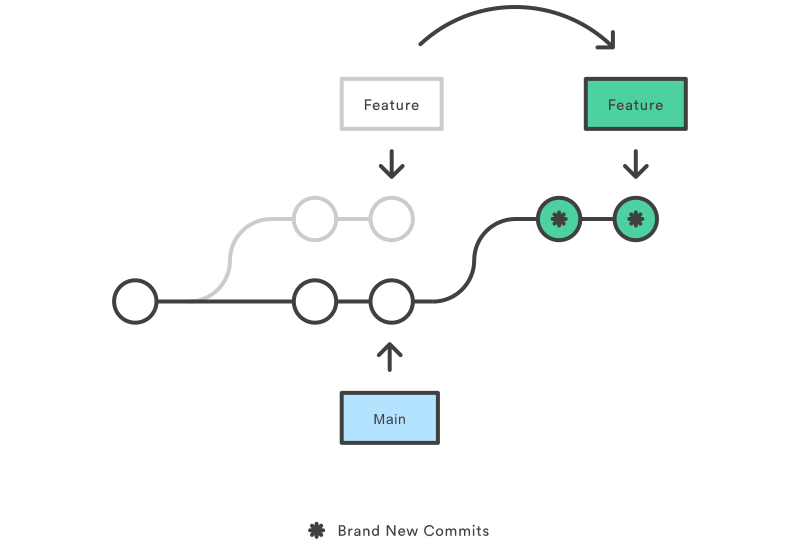
Source: Git Rebase on Atlassian
Rebasing is the changing of the base of your branch from one commit to another making it appears as though you had created your branch from a different commit. Rebasing is one of the two main ways to integrate changes from one branch to another in git, the other being Merging and it involves the use of the command git merge whilst rebasing uses the git rebase command.
To use git rebase, ensure that first, your local main branch is up to date with your remote main branch.
edozie on ~/dev/git_rebase $ git checkout -b rebase_feature
Switched to a new branch 'feature'
edozie on ~/dev/git_rebase $ git add .
edozie on ~/dev/git_rebase $ git commit -m "feature commit"
[rebase_feature c853bfc] feature commit
1 file changed, 0 insertions(+), 0 deletions(-)
edozie on ~/dev/git_rebase $ git rebase main
Current branch rebase_feature is up to date.
From the example above, Git has created new commits from the changes on the rebase_feature branch and attached them to the main branch as a new branch, so it now looks like they were initially committed on the main branch.
The primary reason for rebasing is to maintain a clean and linear project history. A clean git history will come in very handy when it comes to identifying bugs.
Git Merge vs. Git Rebase
While both git merge and git rebase might seem to have a similar outcome, but they vary in operation. git merge merges both histories, i.e. main and feature branches into the feature branch thereby preserving history as is while git rebase rewrites history by appending commits to another branch.
This doesn't automatically imply that git rebase should be always used over git merge, there are certain times when it is good to use one over the other. I wouldn't expressly explain those scenarios here because it is quite vast and needs a whole new article dedicated to it. But, I'll share links for further reading if you want to learn more about them at the end of this article.
Git Revert

Source: Git Revert on Atlassian
The git revert is the git command used to undo a repository's commit history, while the git revert command is most often considered to be an 'undo' type of command, it is however not a traditional undo operation. It doesn't work by undoing the commit from the repository's history or removing it but rather it does this by figuring out a way to invert the changes introduced by the commit and appends a new commit with the resulting inverse content.
edozie on ~/dev/git_revert $ git log --oneline
85111d4 (HEAD -> main) added css_file.css
eeb97a4 added js_file.js
e57d96d initial commit
Here, we see the result of the git log --oneline command, it shows the history of the repository as one commit per line with the commit message and the unique ID/hash for each commit. We can then infer that in the project above there have been three commits so far.
For you to use the git revert command, you would have to use it along with the hash of the commit, you would like to revert.
edozie on ~/dev/git_revert $ git revert 85111d4
[master 8d4804a] Revert "added css_file.css"
1 file changed, 0 insertions(+), 0 deletions(-)
Here, we would now have a new commit with a new hash. Git simply took our specified commit, inversed it and committed a new 'revert commit'. The git revert command comes in very handy when you are working with a team because it doesn't delete git history and it is helpful with bug tracking if it was introduced by a single commit because you would not need to fix the bug manually but you can use the command to go to previous bug-free commit.
Git Cherry Pick
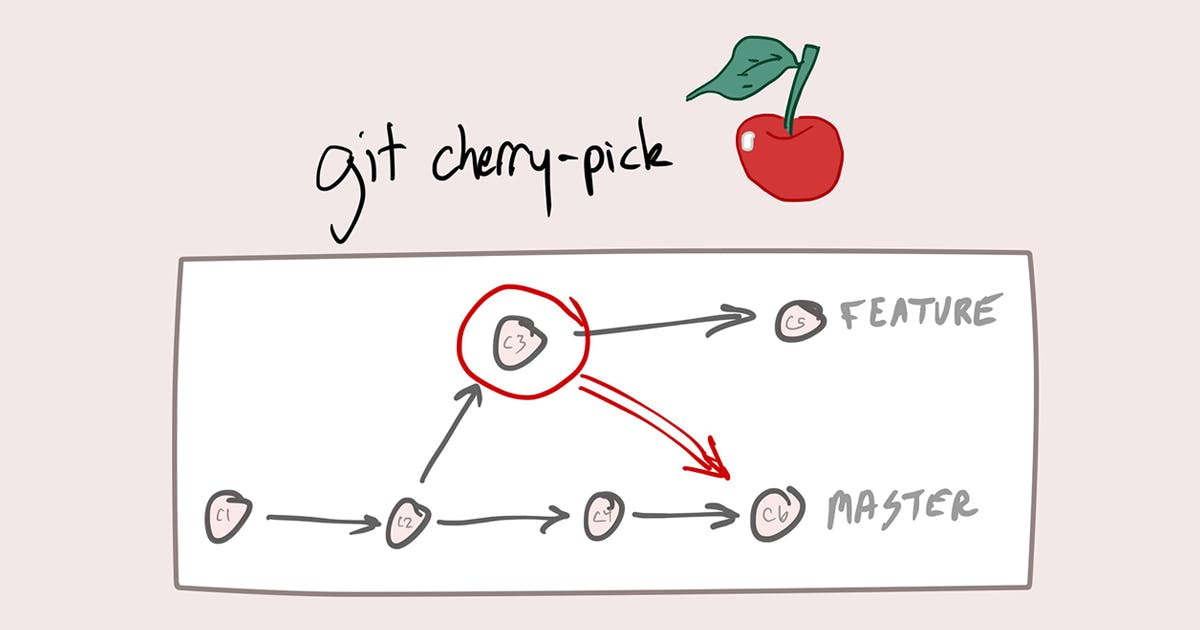
Source: Matt Stauffer Blog on How to Merge only Specific Commits from a Pull Request.
To cherry-pick implies that you tried to pick out the best or most desirable items from a list or group, especially to obtain some advantage or to present something in the best possible light. In the same vein, the git cherry-pick command at a first glance implies that one is trying to cherry-pick particular commits. The command is used to apply the changes from one or more commits on a particular branch and append them to the current working HEAD. We do this by using the command along with the hash for the git commits we intend to cherry-pick.
To use the command, the first thing to be certain about is that you want to be sure that you are on the branch you want to import the change to, to confirm this, use the command, git status . After you have confirmed this, get the hash for the commit you intend to cherry-pick, this can be done with the git log --oneline command.
edozie on ~/dev/git_cherry-pick $ git status
On branch main
nothing to commit, working tree clean
edozie on ~/dev/git_cherry-pick $ git branch
* main
minor
edozie on ~/dev/git_cherry-pick $ git log minor --oneline
e0dc602 Added the Hero section component
afa031b Fixed the Navbar component bug on mobiles
75fbd77 Added styling to the Navbar component
edozie on ~/dev/git_cherry-pick $ git cherry-pick afa031b
[0d105e2] Fixed the Navbar component bug on mobiles
1 file changed, 1 insertion(+), 1 deletion(-)
So what git basically is that it took the changes from the commit on the branch minor and created a new commit with all those changes. We can also use the git cherry-pick command with more than one hashes at a time, we wouldn't get a result too different from our code example. Git would work on the hash as individual hashes and commit changes based on the number of hashes you put down, starting with the first one.
git cherry-pick is somewhat similar to git merge or git rebase but rather than taking on an entire branch's worth of commits or moving commits around, git cherry-pick allows you to cherry-pick the changes you want to apply. With that being said, git cherry-pick is a useful tool but not always the best practice. Cherry-picking can cause duplicate commits and in many scenarios where cherry-picking would work, traditional merges are preferred instead. Some instances where cherry-picking can work are bug hotfixes and undoing changes and restoring lost commits.
To know the appropriate scenarios for when to use either git merge or git rebase , you should check out the following resources, they explain it in detail;
Conclusion
Git provides powerful commands for rewriting history that can be used to clean up and reorganize commit history. However, these commands come with potential pitfalls, so it’s important to understand the effects these tools can have.
Rewriting git history is incredibly useful when working code on your local machine, but more caution should be employed when working with a remote branch.
Thank you for reading the article to the very end. I hope it was very insightful to you.